Hello! Happy Wednesday!
Girls, I am here to blow your mind (pun intended) A few weeks ago, I bit the bullet and bought the Dyson Airwrap I polled you ladies on Instagram to see if you would be interested in a review of the Airwrap, the answer was YES and I even got a few DMs asking for a review of the Dyson Supersonic Hair Dryer (which I have owned for years!) as well. And with the holidays just around the corner and all the shopping that goes with it, I thought this would be the perfect time to share my experience with both items.
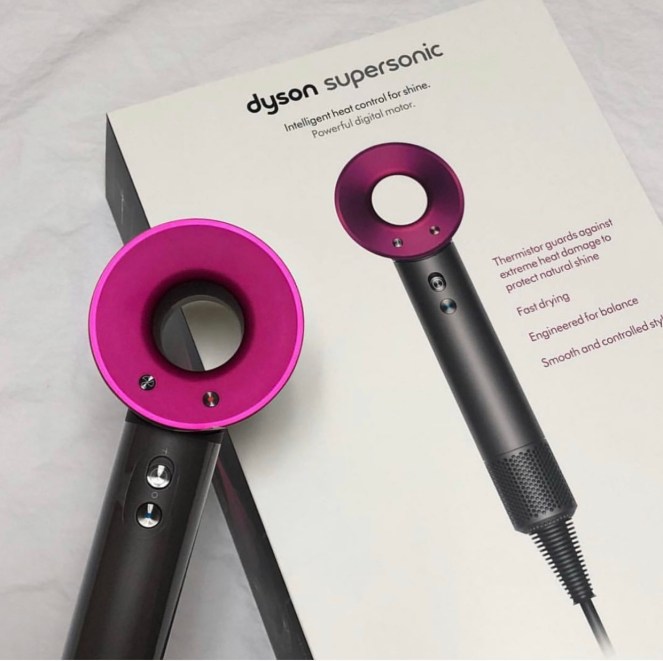
What you get: Out of the box the blow dryer comes with three attachments (they are magnetic- making it so easy to switch out), a smoothing nozzle, styling concentrator, and a diffuser. It also comes with a silicone heat mat to protect your counters and keep the dryer from sliding around.
The number one question I get on this blow dryer is, is it worth it? Yes!!! The Dyson just does not compare to any other hair dryer. I was lucky enough to be gifted this from my parents a few Christmases ago. There is one thing that sticks out to everyone when this blow dryer is discussed: the price. So, let’s just get that out of the way: the Dyson Supersonic hair dryer is $399. Is it worth it? 1000x YES and let me tell you why:
It saves time!
Drying your hair probably goes one of two ways- takes you ages (me) or you give up because you are a hot sweaty mess. I normally end up blow drying my hair right out of the shower because if I don’t, I end up with a fluffy curly mess of hair.
The time savings element is probably the biggest draw of this device:
Before Dyson: Average blow dry time was ~40 minutes
With Dyson: ~20 minutes
Like I mentioned above, I’ve had this dryer for almost three years now, so I thought it would be fun to show how much time I have saved blow drying my hair with the Dyson over the last couple of years. I wash/dry my hair 3 times per week, over the span of 3 years (time I’ve owned my Dyson): that is 468 blow dries, meaning, my Dyson has saved me a 156 HOURS sense owning it.
The time savings alone for me makes it worth it.
Less Damage!
You know when you leave your salon from a fresh cut and wash, your hair feels so SOFT and there is like zero frizz but for some reason you lose all that shine and go back to frizz when you style at home? It’s because your tools are using too much heat. The Dyson uses heat shield technology, measuring the temperature 20 times per second, saving your hair from heat damage, and as a result giving your hair more shine and less frizz!
It’s lightweight!
You can call this a pro and a con because although you can gain some seriously toned arms with a traditional blow dryer (#heavy), I love the Dyson because its ultra-light weight which makes for a much more positive blow-drying experience. Less weight of the blow dryer + less time drying = a lot less sweaty Taylor #WIN
Smoother hair, faster!
Kind of similar point to the first two but I separated it into its own section because if you are like me, you love smooth hair! I have thick, course, curly hair, so attaining smooth hair takes time and (usually) heat. After I switched to the Dyson a few years ago my hair is much much smoother. I use one of the concentrator attachments and direct the air right where I want it.
With all that said: Will it change your life? Yes. But I do understand this item is VERY expensive and won’t fit into everyone’s budget, but if it does, it will be well worth your investment, especially if you have thick/long/hard-to-manage hair. The Dyson name, on its own makes this product lust-worthy, and also speaks to its quality.
And If you have been curious about this dryer in the past, chances are you have done some research, looked at reviews, etc. and I think this review sums up my thought perfectly:
“I find it indescribably frustrating that it’s considered frivolous for a person to spend a few hundred dollars to have the best possible version of something that she uses every single day. How many people have a $500 handbag that they’ve only carried half a dozen times, or an $800 camera that only comes out once a year for vacations?”
– Helen Rosner, on the Dyson supersonic hair dryer.
Well said Helen.
So, if you haven’t already heard, Dyson, has newly released the Dyson Airwrap. This is pretty much a tool that can simultaneously dry and curl your hair leaving you with bouncy, voluminous hair, synonymous to that of a professional blow-out.
Sign me up, right? Having only the best experience with my Dyson Supersonic, I have kept my eyes on this product for about a year, went to click purchase on this numerous times, and chickened out, simply because the cost, roughly $550 for the complete set.
Over the past 10 years or so I have virtually kept the same styling routine, bow dry (with Dyson) and then straighten with my CHI straightener. Fast forward to this Summer, I noticed my hair was getting more breakage at the ends and around my face, after talking with the lady who cuts/colors my hair, she explained it was from years and years of straightening.
After a recent visit to my hair dresser, I noticed how straight she could get my hair with just a brush and a blow dryer, and the blow out lasted for DAYS! I’ve never been able to blow dry and brush my hair straight at the same time (#uncoordinated). Tired of the breakage, I started to seriously read review after review and Youtube video after Youtube video on the Dyson Airwrap. I finally hit the “place my order button” on the ‘complete set’ fully expecting to not love it and return it… but after using it for over a month, I am in love!
So what is the Dyson Airwrap?
It’s basically a blow dryer that blows your hair into curls, volume or straightens. It measures airflow temperature which regulates heat to ensure your hair is drying under 150c not at 200c as most styling tools do.
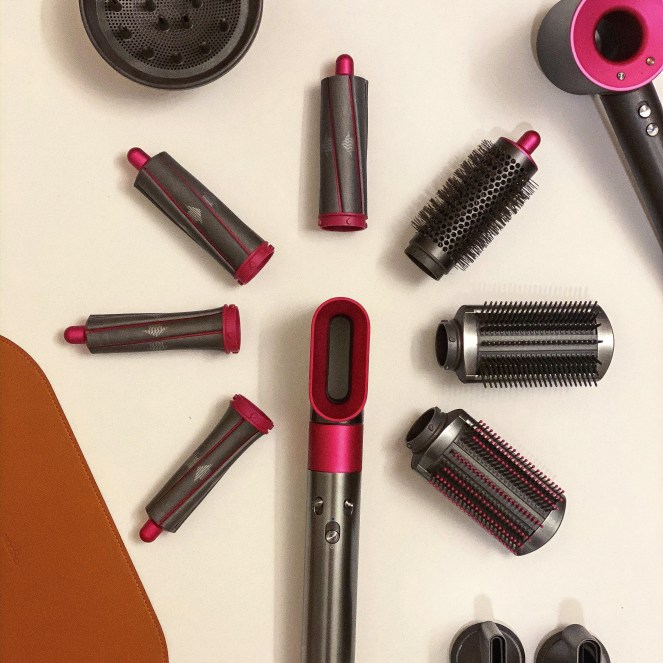
It comes with:
Two 40mm curling barrels, for soft beach curls.
Two 30mm curling barrels for tighter curls.
One firm brush to straighten curly or coarse hair
One soft brush to straighten and smooth fine hair
One volumizing round brush for body and bounce
One pre-style ‘blow dryer’
“Leather” Case
How I use the Airwrap For Straight hair:
1. After a shower, towel dry, and putting in my hair products, I go in with my Dyson Supersonic and do a rough dry, I make sure my roots are almost dry and my ends are damp. This process takes ~ 3 minutes.
2. Next, I section my hair. For me, I start on my left side, and then section it into smaller chunks, starting with the hair closest to my neck and working my way up.
3. With the first smaller section I take the firm smoothing brush and work that through all of the smaller chunks. At this point in the processes, my hair has some wave to it, but the frizz is gone
4. Once that is mostly dry, I go switch to the soft smoothing brush and work my way through that section until I’ve reached my desired sleekness
5. Repeat until all sections are complete.
6. If I notice I have any pieces that are not how I want them, I pop the pre-style head on and use my paddle brush to smooth out that second.
7. I personally finish with a hair oil
How I use the Airwrap for Curls:
Let me just start off my saying that I have never been able to curl my hair before this styler, I have tried curling irons, wands, you name it, and it always looks like a hot mess. So, I am loving that this is able to give me beachy curls without all the frizz and mess my natural hair has.
Just like before.: I go in with my Dyson Supersonic and do a rough dry, I make sure my roots are almost dry and my ends are damp and section off.
1. I work through each section with the 1.6 curling barrel (switching out the barrel for each side of my face) During each curl, I do a 15 second cool shot, and then turn the style off, and applying hairspray every couple of curls. The cool shot helps hold the curl and turning the device off stops the airflow so your hair doesn’t get tangled with dropping the curl and reaching for the next section.
TIP: One thing I want to point out is that when trying to figure out what barrel should be used for what side of your head, hold the two barrels next to your face in your mirror, each arrow should point AWAY from your face.
2. Once I have completed all of the sections, I finish with my bangs by going in with the 1.2 inch curling barrel
3. I go get dressed or do something else for a few minutes then run my fingers through my hair with oil to loosen up the curls
4. Finish with hairspray
And because this styler works best with damp hair, its perfect for touching your hair up after the gym, in fact, my post gym hair looks better than freshly washed hair! After the gym, I take the firm smoothing brush and go through all of my hair, get the base of my head mostly dry, then I finish straightening with the soft smoothing brush or go in with one of the curling barrels.
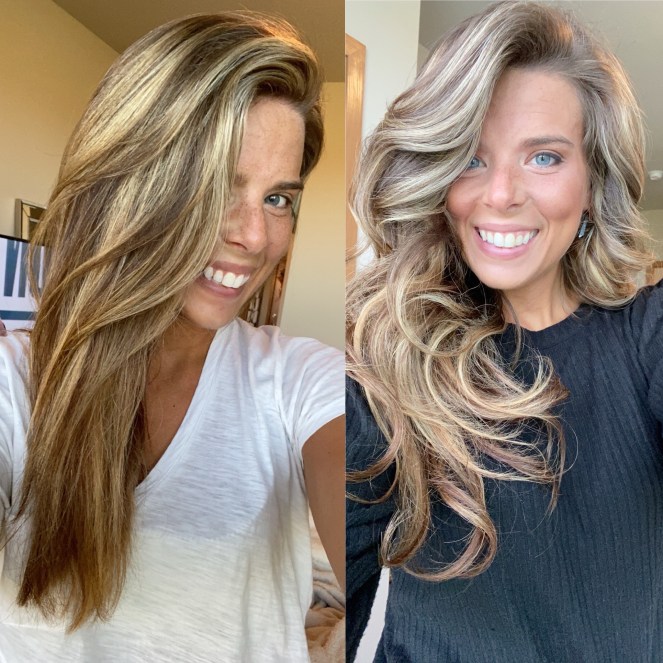
Left Photo is using the Airwrap for straightening and the right photo was the first time using the curling barrels:
A few notes, tips, and tricks I have:
Each curling barrel comes with an arrow that tells you the direction the hair will be blown into so you can curl your hair in the direction away from your face.
Damp hair = best results! You can use this to touch up your hair in the morning when its dry, but if I have a section that got messed up, I take a spray bottle with water, then go in and fix accordingly.
The Airwrap is supposed to be better for your hair since it gives you curls without using extreme heat from curling irons/wands etc.- which I have found to be true! My hair is much softer after not using my straightener for a month and my hair where I once was seeing breakage is getting healthier and growing!
The process is not any quicker (at least in my opinion) than using a regular round brush and hairdryer. This is because in order for the hair to wrap properly around the barrel, you have to work in small sections and this takes time- you can decide if that makes/breaks it for you, for me this product was about protecting my hair not saving time. From shower to straight and/or curly hair it takes about 40 minutes.
The barrels and brushes do not heat up extremely hot, so no real risk of burns etc. like when using a hot tool. They are also very easy to attach and remove- like the Supersonic, the temperature is measured multiple times a second.
My advice is that you ‘cool shot’ the hair for a couple seconds to set the curl before releasing and moving on to the next section of hair. You will then repeat these steps until the entire head is done.
Links To Products Mentioned:
Dyson Supersonic
Overall, both Dyson styling options are amazing, high-quality, and are in my opinion well worth the money. Do I think you need BOTH? Probably not, but I would purchase both of them over and over.
And WOW if you made it this far, congratulations. I know it was a long one, but for those of you that are considering dropping serious money on these items, are thinking about adding them to a wishlist, or are just curious to know my thoughts on them, I wanted to give you the best information and any tips and tricks I have. If you have any other questions, feel free to email me or DM me on Instagram 😊
Xo,


One thought on “Dyson Supersonic Blow Dryer + Airwrap Review”